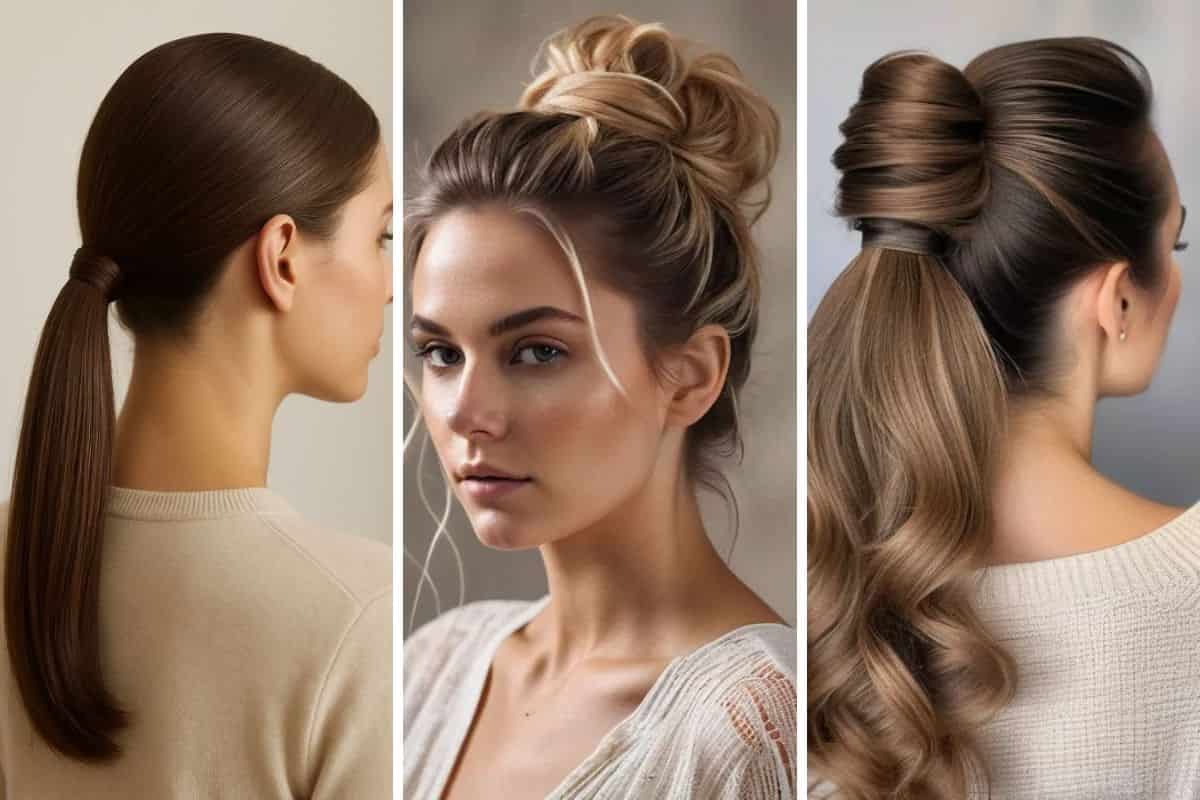
27 Easy Hairstyles for Long Hair You Can Do in Minutes
If you have long hair, you already know the struggle.
It looks stunning, but styling it every morning can feel like a full-time job.
The good news?
You don’t need a salon or endless products to make it look good.
These 27 easy hairstyles are quick, flattering, and work for every occasion whether you’re heading to work, school, or a last-minute dinner.
I’ve grouped them by style so you can find what fits your vibe and schedule.
Quick Everyday Hairstyles
When you’re rushing out the door, you don’t want to wrestle with your hair.
You need styles that look put-together but take almost no time.
These quick everyday hairstyles work for any hair type and can be done with just a brush, a few pins, and a hair tie.
Perfect for mornings before work, school runs, or last-minute plans.
1. Sleek Low Ponytail
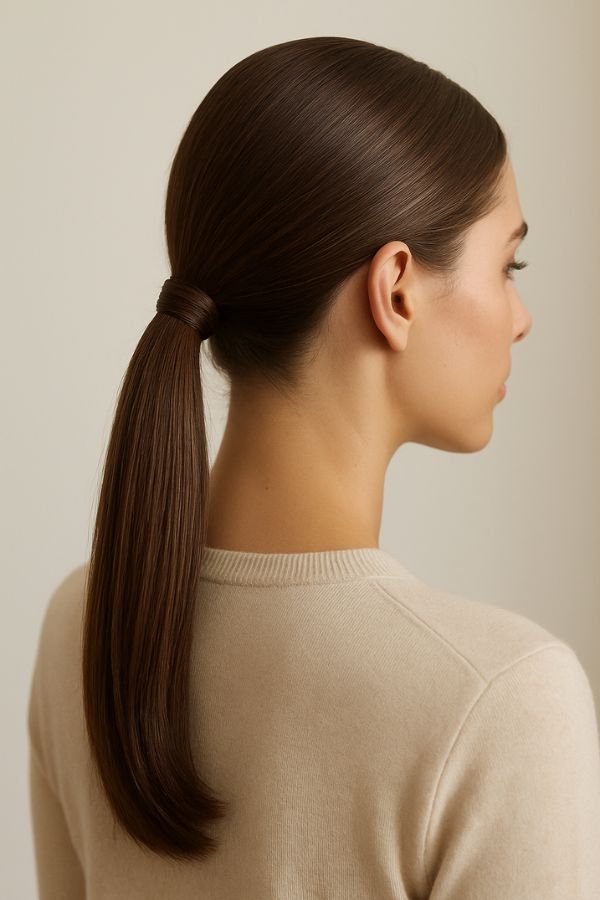
Brush your hair back, tie it low, and wrap a thin strand around the elastic.
Add a drop of serum for shine.
It’s clean, minimal, and always looks intentional.
This style works for busy mornings because it takes little time.
You can wear it to work, errands, or dinner. It keeps your face open and gives a tidy shape from every angle.
It also pairs well with hoops or simple studs.
It holds up through heat and humidity if you use a firm tie
2. Half-Up Twist

Take two small sections from the front, twist them, and pin at the back.
It softens your face and gives a relaxed, feminine touch without effort.
The shape frames your cheekbones and softens sharp angles.
You get a light lift at the crown without pulling your hair back fully.
It works with straight, wavy, or curled hair.
You can use a texturizing spray if you want more grip.
This style looks good for daily wear and stays put through a full day at work or school.
It also photographs well from every side.
3. Messy Bun

Flip your head forward and scoop your hair into a loose bundle.
Hold it near the crown and twist it just enough to form a soft bun.
Secure it with an elastic or a claw clip.
Do not smooth the surface.
Let some texture show.
Pull a few strands around your face so the shape looks easy and lived in.
Leave small pieces at the nape if you want more softness.
This style works when you need speed and comfort. It stays light on your head and handles movement well.
You can dress it up with a simple clip or keep it plain for everyday wear.
It looks balanced from all angles because the volume sits high and the loose pieces frame your face
4. Bubble Ponytail
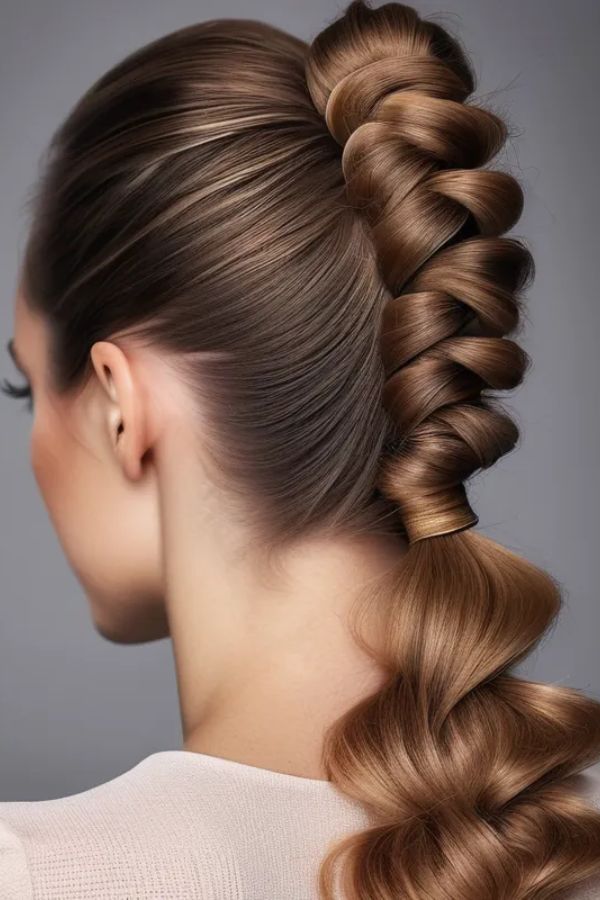
Start with a smooth ponytail at the height you like.
Use a firm tie so the base stays steady.
Add small elastics down the length, spacing them a few inches apart.
Hold each section with one hand and gently tug the sides with the other hand to create round shapes.
Keep the pulls even so the bubbles look uniform.
This adds lift and shape without heat.
It works well on long hair because the length gives you more bubbles.
You can place the ponytail low for a simple look or higher for more lift.
This style stays secure through a busy day and gives a playful change from a plain ponytail.
You can swap the elastics for colored ones if you want a small accent
5. High Half-Up Ponytail
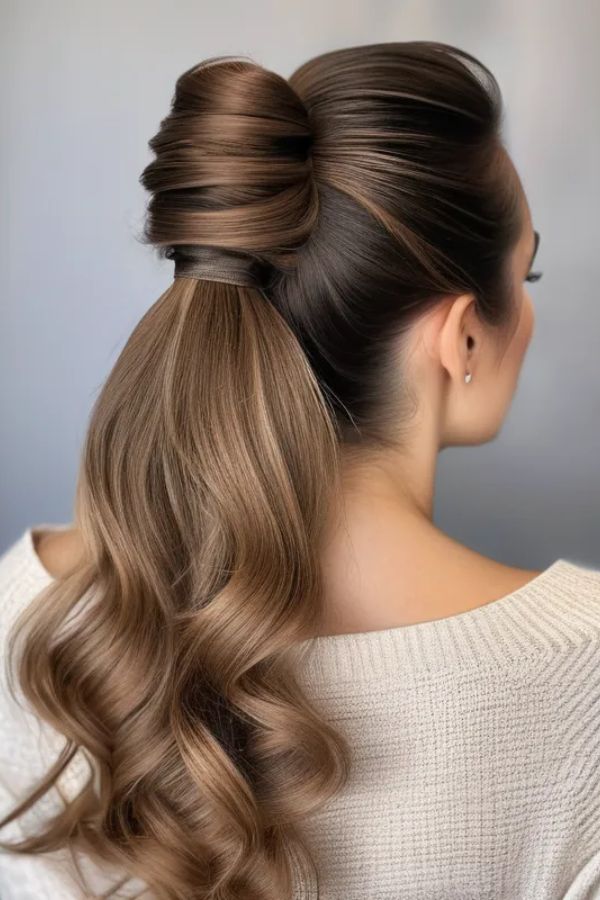
Separate the top half of your hair from temple to temple and lift it toward the crown.
Keep the section smooth so the shape looks clean.
Tie it tight enough to stay put but not so tight that it pulls at your scalp.
Let the lower half fall straight down.
This gives you height at the top and keeps your face open. It also keeps hair out of your eyes without pulling everything back.
Add a scrunchie, clip, or ribbon if you want a small accent.
This style works on straight, wavy, or curled hair.
It holds well through a full day and looks good from the front and back.
You can curl the ends of the ponytail for extra movement or leave it natural for a quick look.
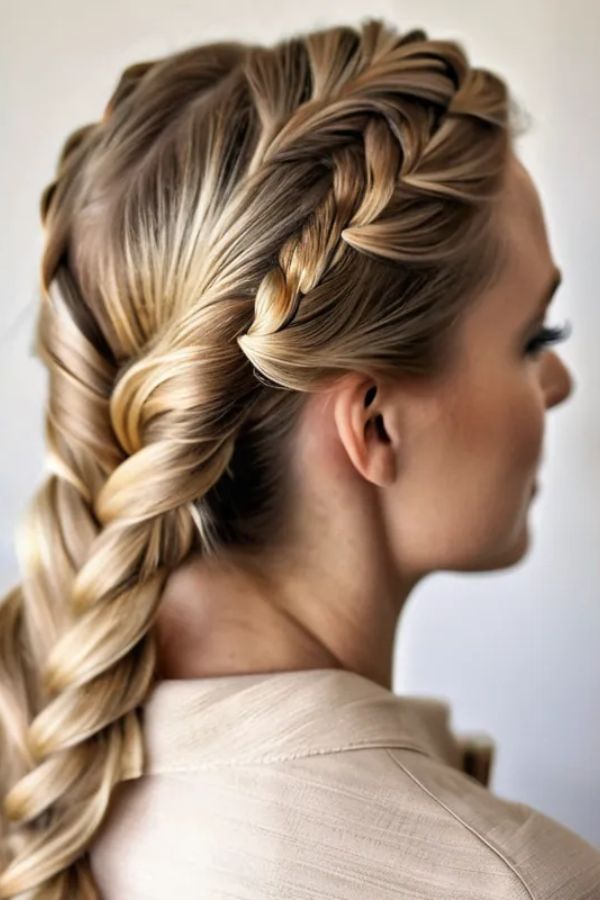
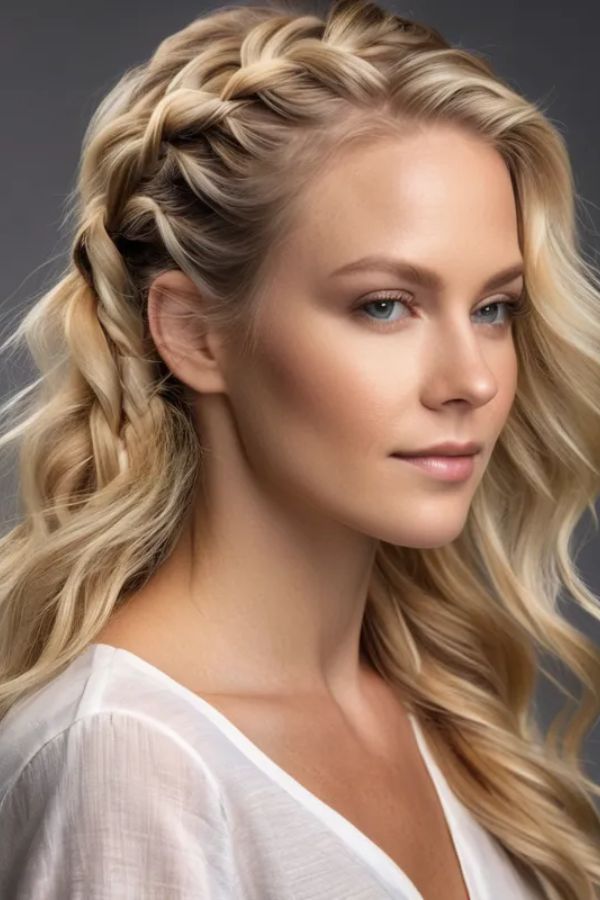
6. Loose Side Braid
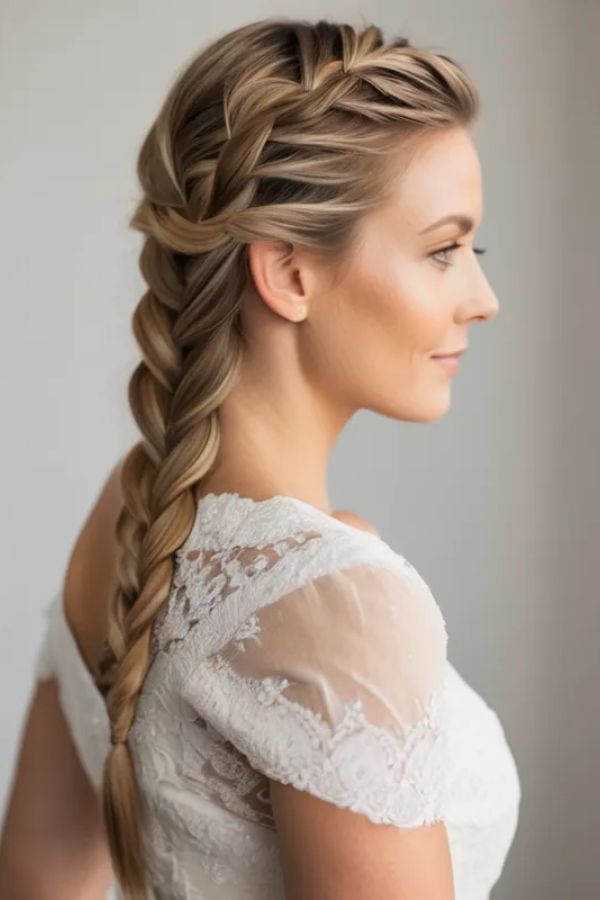
Sweep all your hair to one side so it rests over your shoulder.
Keep the base smooth so the braid sits flat against your neck.
Divide the hair into three equal sections and start a simple braid.
Keep your grip light so the shape looks soft, not tight.
Secure the end with a small elastic.
Gently pull the braid’s edges to widen it and add more volume. This gives a fuller shape and a relaxed feel.
Leave a few pieces around your face if you want extra softness.
This style holds up through a full day and works for work, errands, or a casual night out.
You get a neat finish that still feels easy and natural.
7. Simple Claw Clip Twist
Gather your hair at the back like you are making a low ponytail.
Twist the length upward until it folds against your head.
Hold the twist with one hand and secure it with a claw clip that can handle your hair thickness.
Let the ends stick out at the top or tuck them in if you want a cleaner finish.
Keep the front soft so the shape looks easy.
This style works on clean or second-day hair because the clip holds texture well.
It takes seconds to do and stays comfortable for hours.
You can use a larger clip for long or thick hair or a small one for a tighter grip.
It suits work, errands, or casual days because it keeps your hair off your neck while still looking put together.
8. Headband Pushback
Place a padded or fabric headband over your hair, starting near your hairline.
Push it back slightly to create gentle lift at the crown.
Smooth any front strands so they stay behind the band, or leave a few wisps for a soft, natural frame.
This style works on straight, wavy, or slightly messy hair. It keeps hair off your face without needing pins or elastics.
You can pair it with a low bun, ponytail, or leave your hair down.
It instantly gives a polished look while staying comfortable all day. It’s perfect for work, casual outings, or days when you want quick refinement without effort.
Braids You Can Master Fast
You don’t need advanced skills to create stylish braids.
Start with basic three-strand braids and gradually try variations like side braids, fishtails, or rope twists.
Each style looks intricate but becomes quick once you practice a few times.
Braids keep long hair neat and prevent tangles while adding natural texture and dimension.
They work for everyday wear, office settings, or special occasions.
You can leave them loose for a relaxed vibe or tighten them for a polished finish.
Adding small accessories like elastics, ribbons, or clips can instantly elevate the look.
Once you get the hang of the patterns, braiding becomes a fast, versatile way to change up your hairstyle without spending hours.
9. Classic Three-Strand Braid
Start by brushing your hair to remove tangles and create a smooth base.
Divide your hair into three even sections.
Cross the right section over the middle, then the left over the new middle, repeating until you reach the ends.
Secure with a small elastic to prevent unraveling.
You can keep the braid tight for a polished look or loosen it slightly for a softer, more relaxed style.
Adding a ribbon, scarf, or scrunchie gives a fun, personalized touch and can tie the look to your outfit.
This braid works on straight, wavy, or slightly curly hair and holds up well throughout the day.
It’s perfect for casual outings, work, or dressier occasions, and you can pair it with other styles like a half-up twist or messy bun for variation.
10. Fishtail Braid
Start with brushed or slightly textured hair to give the braid grip. Divide your hair into two equal sections.
Take a thin strand from the outer edge of the right section and cross it over to the left section.
Then do the same from the left to the right, keeping the sections tight at the top.
Continue alternating until you reach the ends and secure with a small elastic.
Gently pull the braid’s edges to loosen it slightly for a fuller, softer appearance.
This braid works on straight, wavy, or slightly curled hair and gives a relaxed, boho feel.
You can wear it over one shoulder, down your back, or even as a side braid for variation.
Add small accessories like beads, ribbons, or tiny flowers to elevate the look for casual or dressy occasions
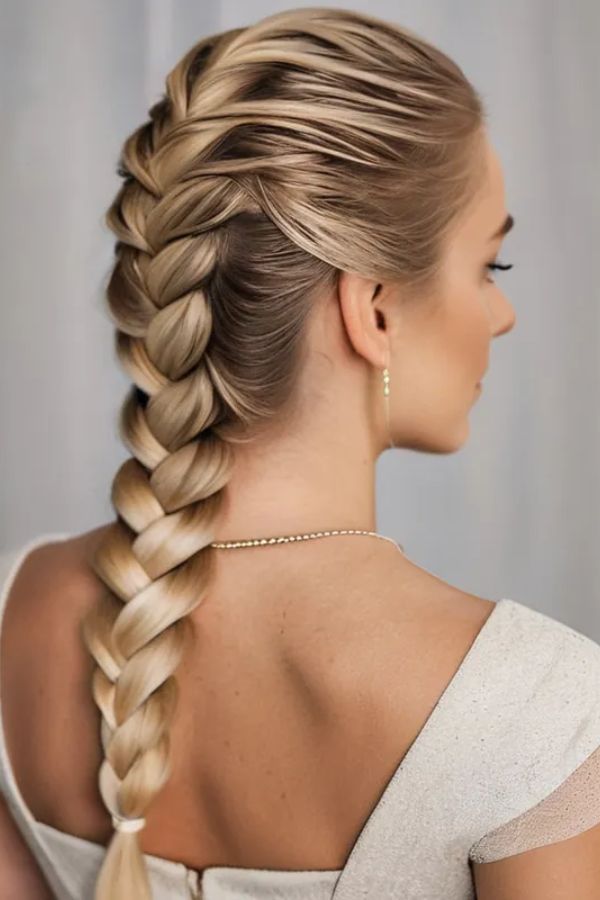
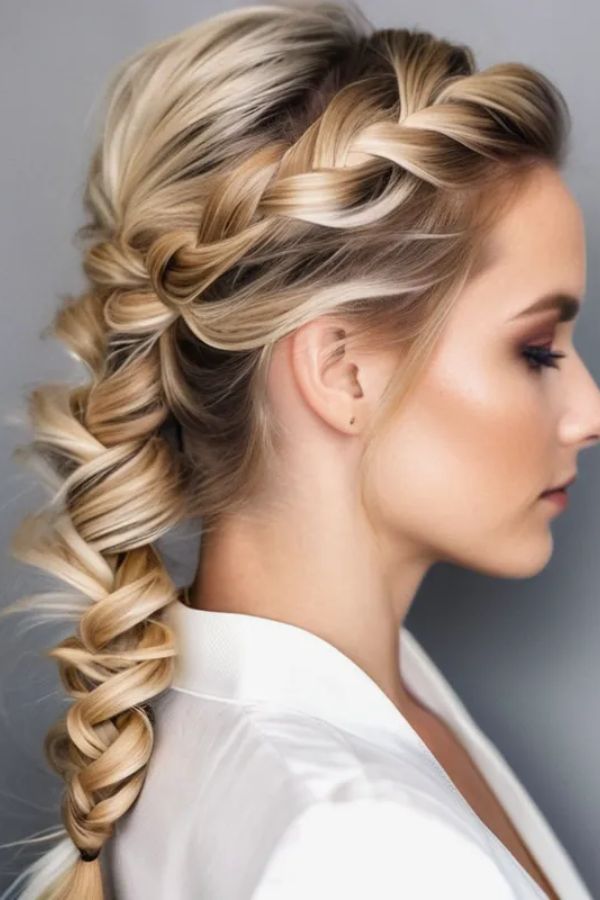
11 . Dutch Braid Ponytail

Begin at the crown of your head and divide your hair into three even sections.
Take the right strand and cross it under the middle, then do the same with the left, creating the braid so it sits on top of the hair instead of blending in.
As you braid, gradually add small sections from the sides to keep the braid tight and controlled.
Once you reach about halfway down, stop adding new hair and continue a simple three-strand braid to the ends.
Secure the braid with an elastic and gather the remaining hair into a ponytail.
This style holds well for workouts, running, or busy days because it keeps hair off your face and stays secure.
It creates a lifted, sporty look while still looking intentional and neat.
You can wear it high for more energy or lower for a casual vibe.
Adding a small scrunchie or ribbon at the base of the braid can give a polished, playful finish.
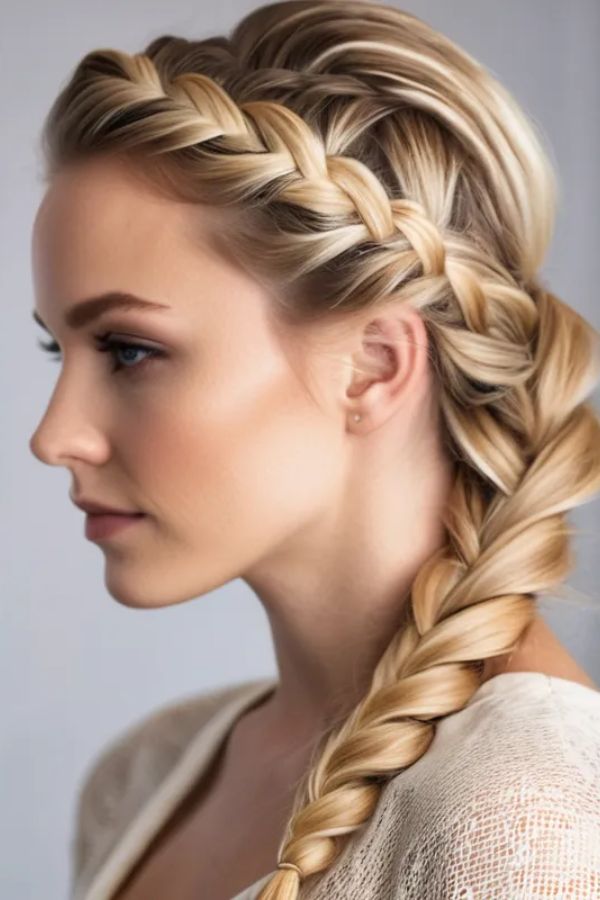
12. Side Braid
Pull all your hair to one side so it sits over your shoulder.
Brush it lightly so the braid starts smooth.
Divide your hair into three sections and braid with a loose grip so the shape looks soft.
Secure the end with a small elastic.
Pull a few strands around your face to frame your features.
This gives a relaxed look that still feels put together.
If you want a dressier finish, wrap the braid into a low side bun and pin it in place.
This works well for long days because it stays neat while still feeling light and easy.
You can add a clip or ribbon to match your outfit.
13. Rope Braid
Divide your hair into two equal sections.
Twist each section in the same direction from roots to ends. Keep the twists tight so they hold their shape.
Cross the two twisted sections over each other in the opposite direction. This creates a smooth rope effect that stays secure.
Tie the end with a small elastic.
Run your fingers along the braid to soften the surface if you want a fuller look.
This style works well on straight, wavy, or layered hair because the twists keep shorter pieces in place. It feels light and stays neat through the day.
Each of these braids takes under ten minutes and gives your everyday look a quick upgrade.
Once you learn the basic hand movements, you can do them without a mirror and finish them anywhere.
Chic Buns and Updos
When you want to look polished but don’t have time for complicated styling, buns and updos are your best bet.
They work for meetings, dates, or any moment when you want to seem like you actually planned your look.
These quick versions take just a few pins and minutes.
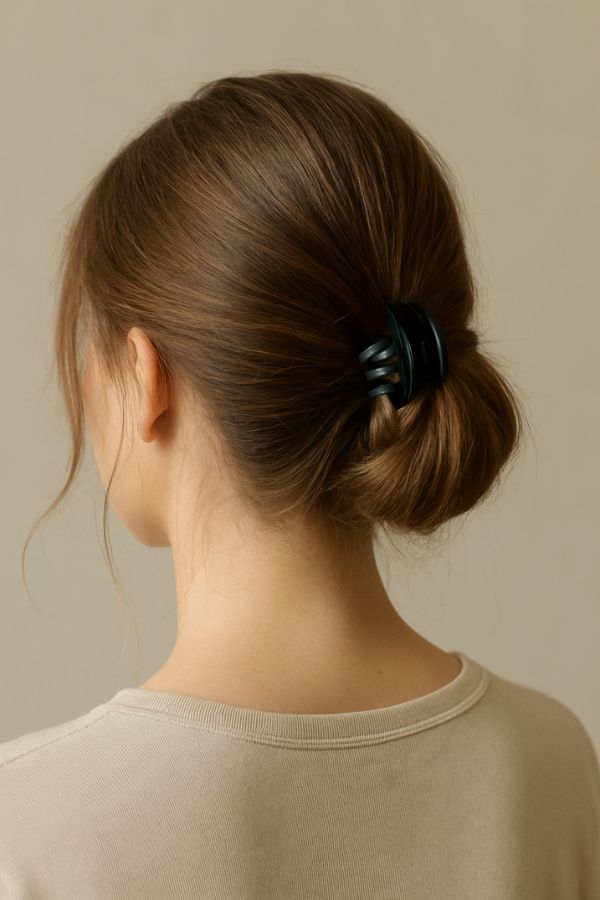
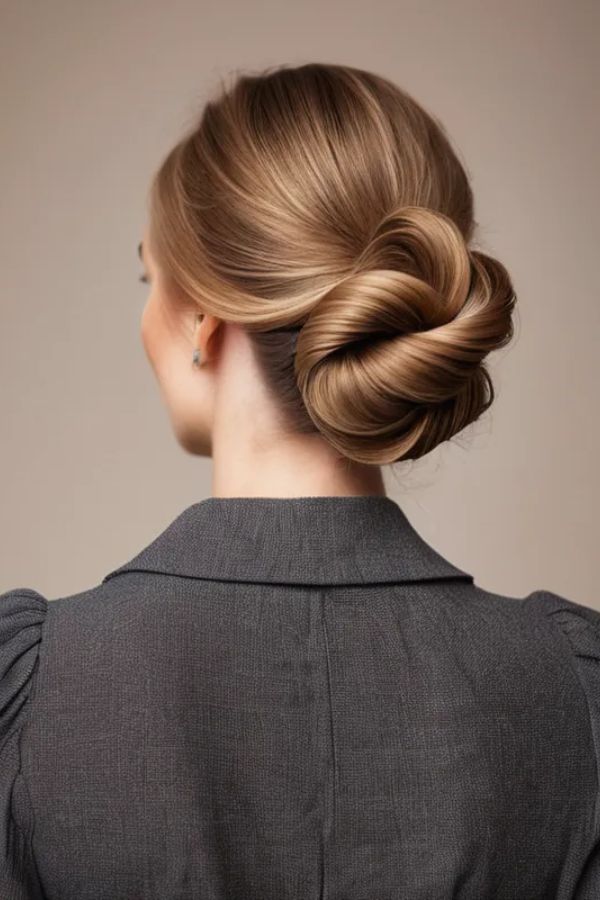
14. Low Knot Bun
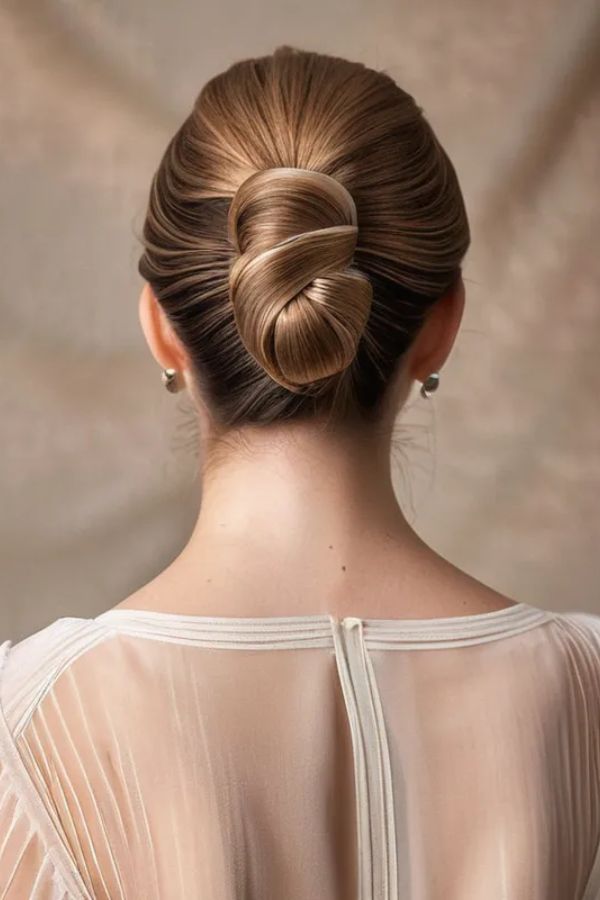
Part your hair in the center so the front looks balanced.
Gather your hair into a low ponytail at the nape of your neck and keep the base smooth.
Twist the ponytail until it coils into a compact knot. Hold the shape with one hand and secure it with bobby pins placed close to the scalp.
Tuck in any loose ends so the bun looks clean from every angle.
Smooth the front with a small amount of serum to keep flyaways down.
This style gives a simple, polished look that works for office days, meetings, or formal events.
It stays comfortable for long hours and pairs well with minimal jewelry or structured outfits
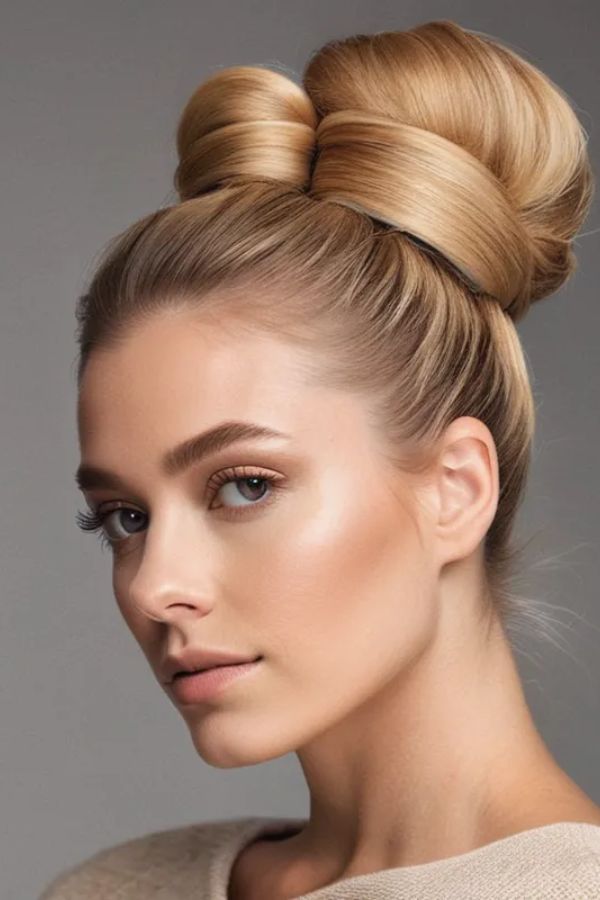
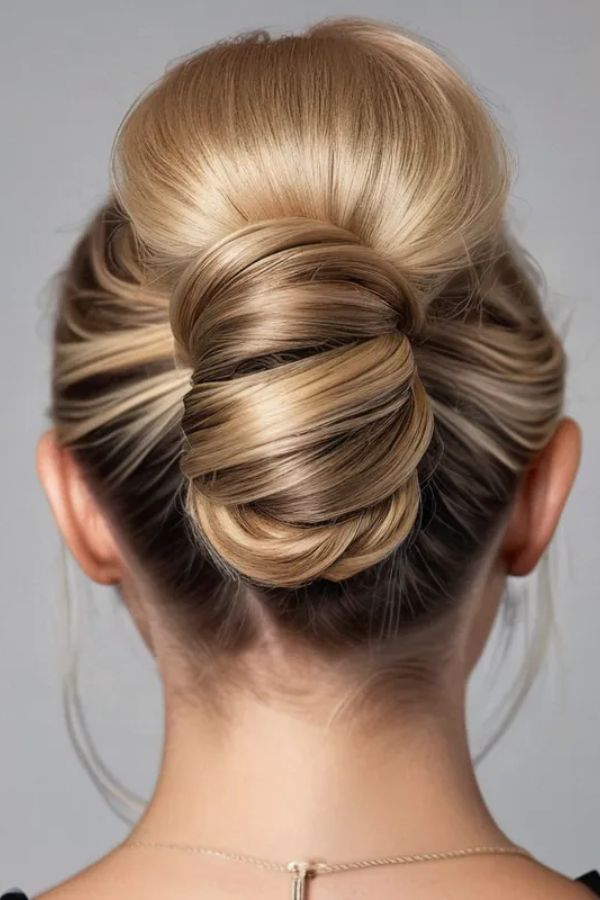
15. Twisted Top Bun
Gather your hair into a high ponytail and keep the base smooth.
Twist the ponytail tightly from roots to ends so it forms a firm rope.
Wrap the twist around the base to create a tall, clean bun. Hold it in place with bobby pins spaced evenly around the bun.
Tuck in any loose ends so the shape looks neat from every angle.
Finish with a light mist of hairspray to keep the bun secure through the day.
This style opens up your face and highlights your jawline and cheekbones.
It pairs well with bold earrings or strong makeup because the hair stays pulled back and out of the way.
You can wear it for work, workouts, or nights out because it holds well and stays comfortable.
16. Braided Bun
Start by brushing your hair so the ponytail looks smooth.
Gather your hair into a ponytail at the height you prefer. Keep the base tight so the bun holds.
Divide the ponytail into three sections and braid it all the way to the ends. Secure with a small elastic.
Wrap the braid around the base of the ponytail to form a bun. Keep the coil even so the shape looks clean.
Pin the braid in place with bobby pins placed close to the scalp. Add more pins if your hair is thick or heavy.
Tuck the ends under the bun so the finish looks neat from every angle.
The braided texture gives grip, which keeps the bun from slipping.
This style looks detailed but takes only a few minutes. It works well for weddings, dinners, work events, or any day you want something polished without much effort
17. Half-Up Bun
Take the top half of your hair from temple to temple and lift it toward the crown.
Twist this section until it forms a small bun. Keep the twist light so the bun has some bounce and does not sit too flat.
Secure it with an elastic, small clip, or a few bobby pins. Let the ends stick out slightly for a relaxed shape.
Leave the bottom half of your hair down to show off your length. This creates a nice balance between volume at the top and movement at the bottom.
You can leave a few soft pieces around your face if you want extra framing.
This style works well on wavy or layered hair because it highlights texture while keeping your face clear.
It feels casual and easy but still looks intentional for work, errands, or casual nights out
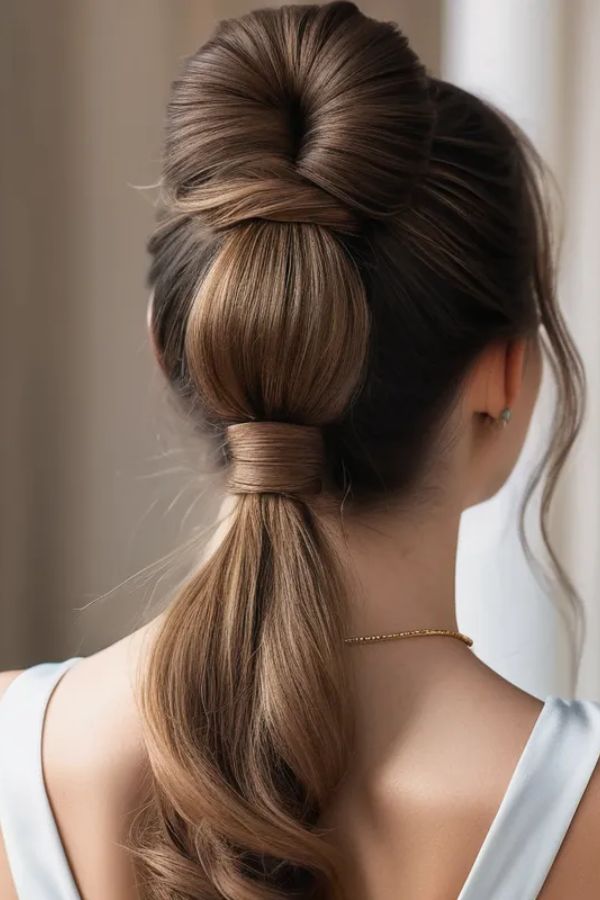
18. Bun with Hair Tie Trick
Brush your hair and pull it into a ponytail at the height you like.
Secure the ponytail with a firm hair tie so the base stays steady.
Slide a second elastic a few inches above the ends of your ponytail. Leave a small tail below it.
Fold the ponytail upward and tuck the section between the two elastics to form a fuller loop.
Wrap the small tail around the base to cover the ties and pin it in place.
Adjust the loop with your fingers to create more volume and an even shape.
This double-tie method gives instant lift, especially if your hair is fine or tends to fall flat.
It creates a full, rounded bun that holds its structure through the day.
You can wear it high, mid, or low depending on your outfit or the look you wan
Heatless and Lazy-Day Styles
Some days you just want your hair to look good without spending time or using heat tools.
These styles are simple, gentle on your hair, and perfect for weekends, errands, or slow mornings.
They keep your long hair neat while still feeling effortless.
19. Overnight Waves
Wash your hair at night and let it air dry until it feels slightly damp.
Brush it gently so the braid starts smooth.
Create a loose three strand braid and tie the end with a soft elastic. Keep the braid light so the waves form evenly.
Sleep with the braid in. It stays comfortable and protects your hair as you move.
In the morning, undo the braid and shake out the sections with your fingers. Do not use a brush because it can make the waves frizzy.
Add a small amount of dry shampoo at the roots for lift. Work it in with your fingertips to build volume and texture.
These waves look soft and natural and require no heat.
They hold well through the day and work for casual or work settings
20. Scarf Ponytail
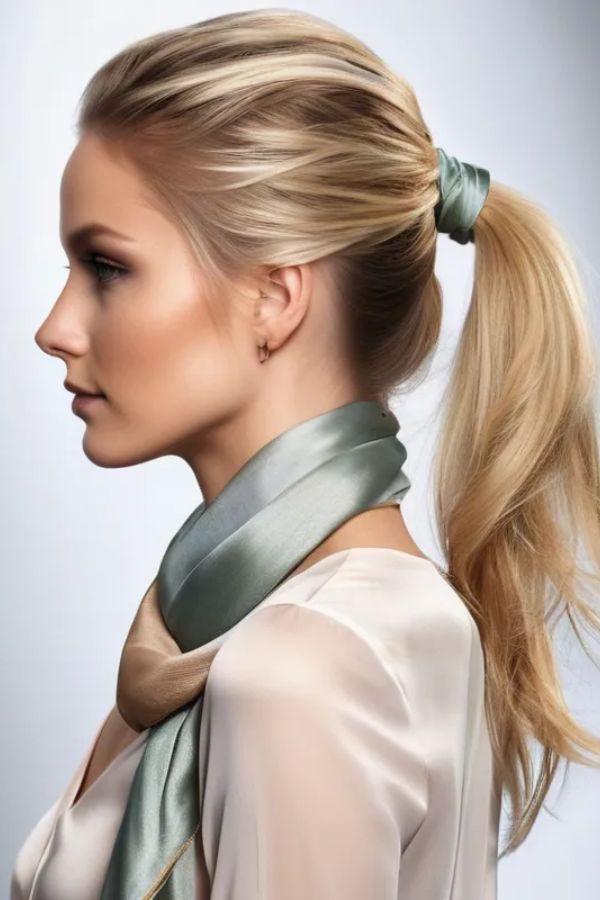
Tie your hair into a simple ponytail at the height you prefer. Keep the base smooth so the scarf sits cleanly.
Fold a silk scarf into a long strip and wrap it around the base of the ponytail. Pull it tight enough to stay secure.
Let the scarf ends hang down with your hair for a relaxed look. If you want something more polished, tie the ends into a bow.
Adjust the scarf so the fabric sits flat and the colors show clearly.
This adds color and texture and turns a plain ponytail into a small statement.
It works well with straight, wavy, or curled hair and pairs easily with simple outfits.
You can switch scarves to match your clothes, which makes this style quick and customizable.
21. Headband Tuck
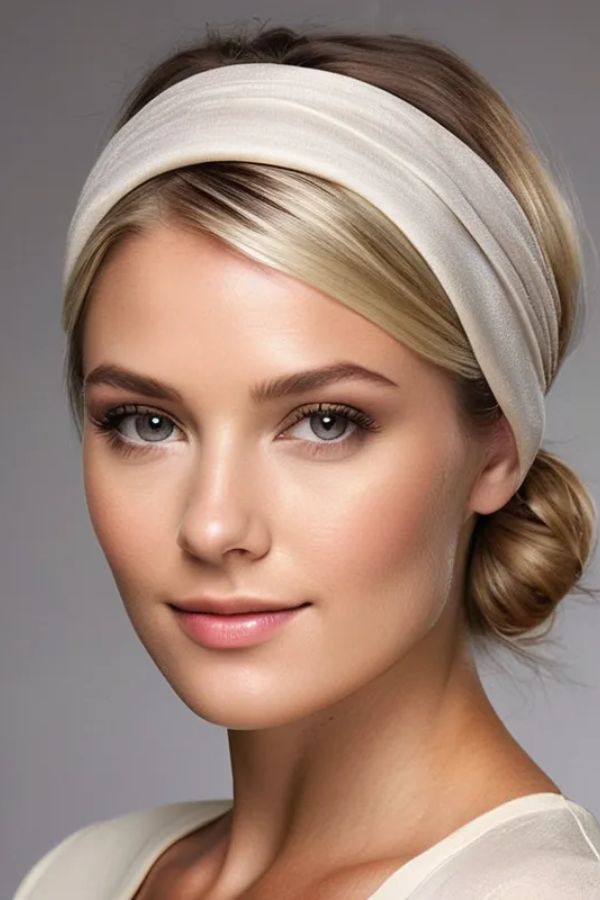
Place a soft, flexible fabric headband around your head so it sits comfortably near your hairline.
Take small sections of hair from the sides and tuck them inward under the band, rolling gently toward the back.
Continue tucking until all the hair is hidden inside the headband.
Use bobby pins to secure any loose sections or to keep the tuck in place if needed.
Adjust the band so it sits evenly and the tucked hair looks smooth.
This creates a soft, vintage-inspired silhouette that frames your face delicately.
It works on medium to long hair and adds elegance without effort.
Perfect for casual outings, picnics, or any day you want a quick, polished style with a retro touch.
22. Low Bubble Braid
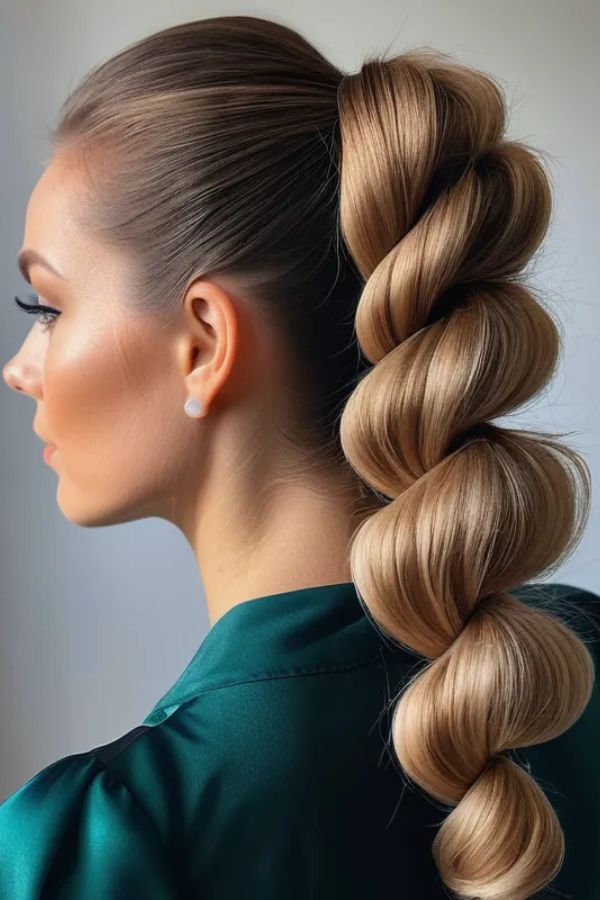
Begin by brushing your hair and gathering it into a low ponytail at the nape of your neck.
Secure the base with a strong elastic to keep it steady.
Add small clear elastics every few inches down the length of the ponytail. Make sure the spacing is even so the bubbles are uniform.
Gently pull outward on each section between the elastics to create rounded “bubbles.” Adjust the tension to make them as full or subtle as you like.
This style works especially well on thick, wavy, or textured hair because it holds the shape naturally.
It’s playful and adds dimension to a simple ponytail without using heat.
These braids take just a few minutes, protect your hair from damage, and transition easily from home to casual outings.
You can add a ribbon or small clips to the base for an extra touch of style.
Trendy and Event Styles
When you’re heading out or just want to feel extra, these styles get attention.
They’re perfect for parties, brunches, or any moment you want to look like you tried without actually spending hours.
23. 90s Blowout Ponytail

Start by brushing your hair thoroughly to remove tangles and smooth the crown.
Create a high or mid ponytail and secure it with a strong elastic.
Use a round brush or straightener to flip the ends of the ponytail outward, giving it that classic 90s bounce.
Lightly backcomb at the crown if you want extra volume and lift.
Add bold clips, a scrunchie, or a statement hair accessory at the base for a polished, playful touch.
Smooth any flyaways with a small amount of serum or hairspray to keep the look sleek.
The ponytail remains bouncy and full throughout the day, giving off a supermodel-era vibe.
It works on straight or slightly wavy hair and instantly upgrades a simple ponytail into a statement hairstyle.
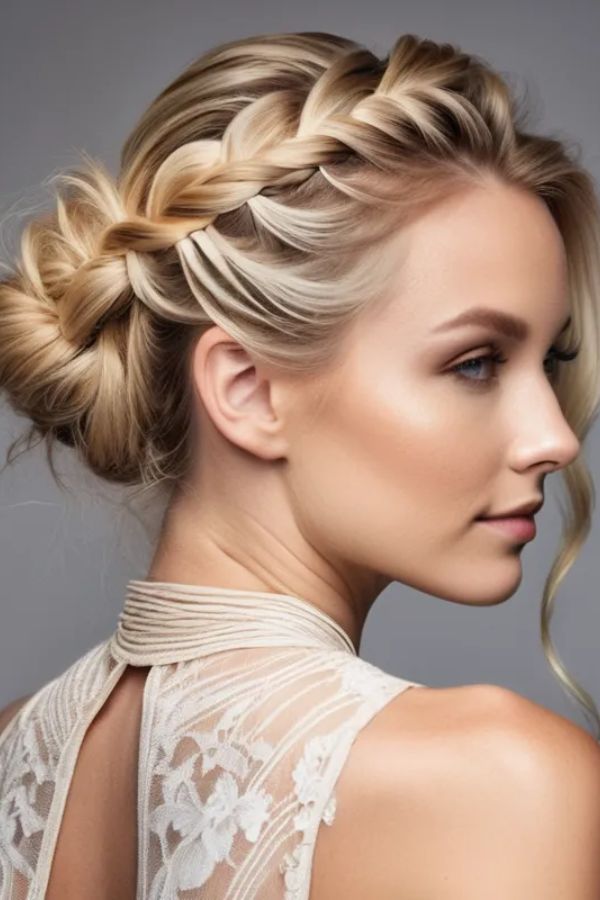
24. Half-Up Braided Crown

Take two small sections of hair from just above your temples on each side of your head.
Braid each section all the way to the ends, keeping the plaits tight enough to hold but soft enough to look delicate.
Bring the braids across the back of your head and pin them together with bobby pins, forming a crown-like effect.
Tuck in the ends or leave a few strands peeking out for a relaxed, romantic vibe.
Gently loosen sections of the braid if you want a fuller, more textured look.
The remaining hair can stay down naturally, in soft waves, or lightly curled to enhance the style.
This look works for casual dates, outdoor events, or even formal occasions like garden weddings.
It keeps hair away from your face while adding a feminine, polished touch that feels effortless yet intentional.
25. Y2K Pigtails
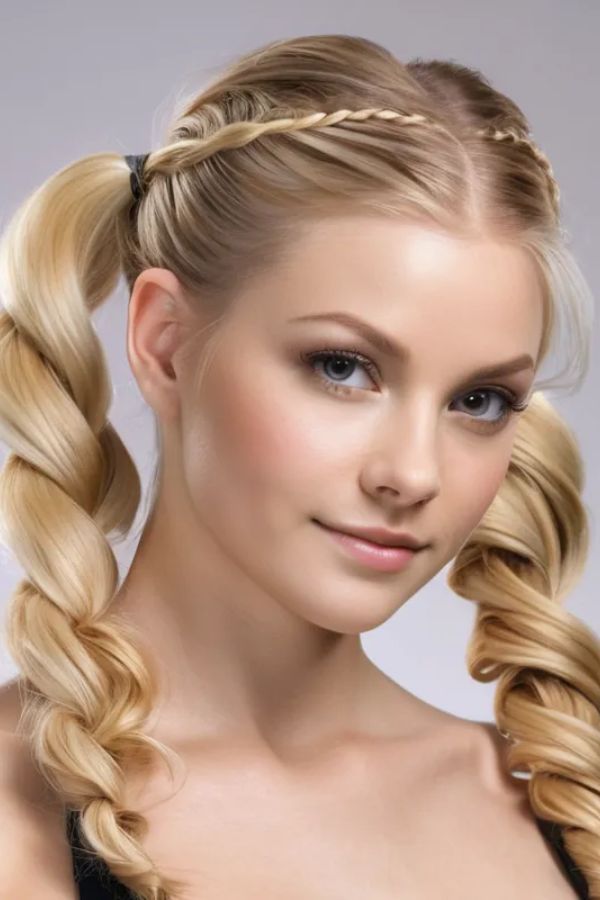
Part your hair down the middle to create two even sections.
Gather each section into a high ponytail on either side of your head, securing them with strong elastics.
Leave a few strands loose around your face to frame your features and soften the look.
Optional: curl or straighten the face-framing tendrils for a polished finish, or add waves to the ponytails for extra texture.
You can wrap small pieces of hair around the elastics to hide them and give a cleaner appearance.
This style is playful, nostalgic, and instantly adds a fun, youthful vibe.
It works especially well on long hair, as the length gives the pigtails bounce and movement.
Add accessories like scrunchies, clips, or mini barrettes to enhance the Y2K aesthetic.
Elegant and Formal Looks
When you want hair that’s polished without looking overdone, these styles are perfect.
They work for weddings, dinners, formal meetings, or any event where you want to look effortlessly chic.
26. Twisted Low Updo
Part your hair in the middle or slightly off-center to create a flattering frame for your face.
Take a small section from one side near the temple, twist it gently toward the back, and hold it in place.
Repeat on the other side, making sure both twists meet at the nape of your neck.
Pin the twists together with bobby pins so they stay secure without flattening the volume.
Tuck the remaining hair under or leave a small section loose for softness, depending on the look you want.
Finish with a pearl, decorative clip, or small barrette to add a timeless, elegant touch.
This style keeps hair neatly in place while maintaining a soft, refined appearance.
It works well for work, formal events, or any occasion where you want a polished but gentle hairstyle.
You can slightly loosen the twists or pull out face-framing strands for a more romantic, effortless vibe.
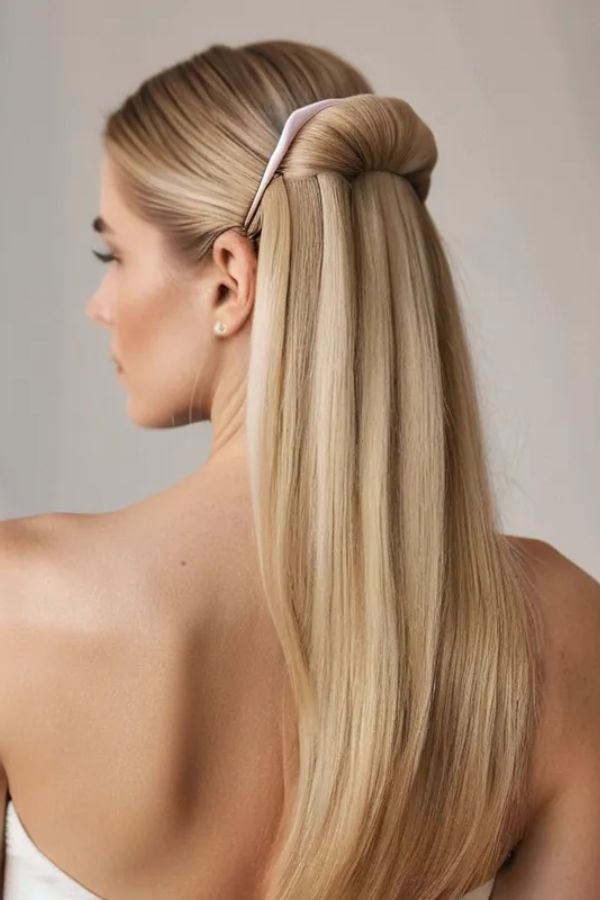
27. Sleek Straight Half-Up

Start by flat ironing your hair to create a smooth, glossy finish. Make sure your strands are tangle-free for the cleanest result.
Take the top half of your hair, starting from the temples, and pull it toward the back of your head. Secure it with a clip, hair tie, or small elastic.
Keep the sides smooth and close to your head for a polished, professional look. Leave the bottom half down to show off length and shine.
Apply a small amount of glossy serum to the ends and surface for extra polish, especially if you’re preparing for an evening event.
This style works on long, medium, or layered hair and keeps hair out of your face while still looking intentional.
It’s quick, simple, and refined, making it perfect for workdays, meetings, or formal occasions.
With just a few steps and the right clips or pins, your hair can go from everyday to event-ready in minutes.
It proves you don’t need hours in front of the mirror to achieve a classy, put-together hairstyle.